When we moved into the old Krarup School, we saw the great potential of this housewith plenty of space to make something of it. Following some interesting conversations over coffee with local people about our house’s past, we decided to make the old school more accessible by setting up a small bed and breakfast in the side building. We also plan to hold different events during the year. Rather than luxury rooms, we just wanted to create a cosy place to stay in the charming style of the old school. So we got started on it in 2020 and thought it would be very interesting and exciting for people to follow the building process from the beginning with a few pictures and some explanation. More pictures can be seen in the gallery. Enjoy!
We tried to build as environmentally friendly and as sustainably as possible. This meant, for example, that we used local reclaimed building materials and where possible built by hand in preference to using machines. We also planned to build during daylight hours all year round taking advantage of natural light. We built some of the furniture ourselves from reclaimed timber. All this was very laborious and took a lot of time, but it developed step by step with a rewarding feeling of going in the right direction.
2020, spring
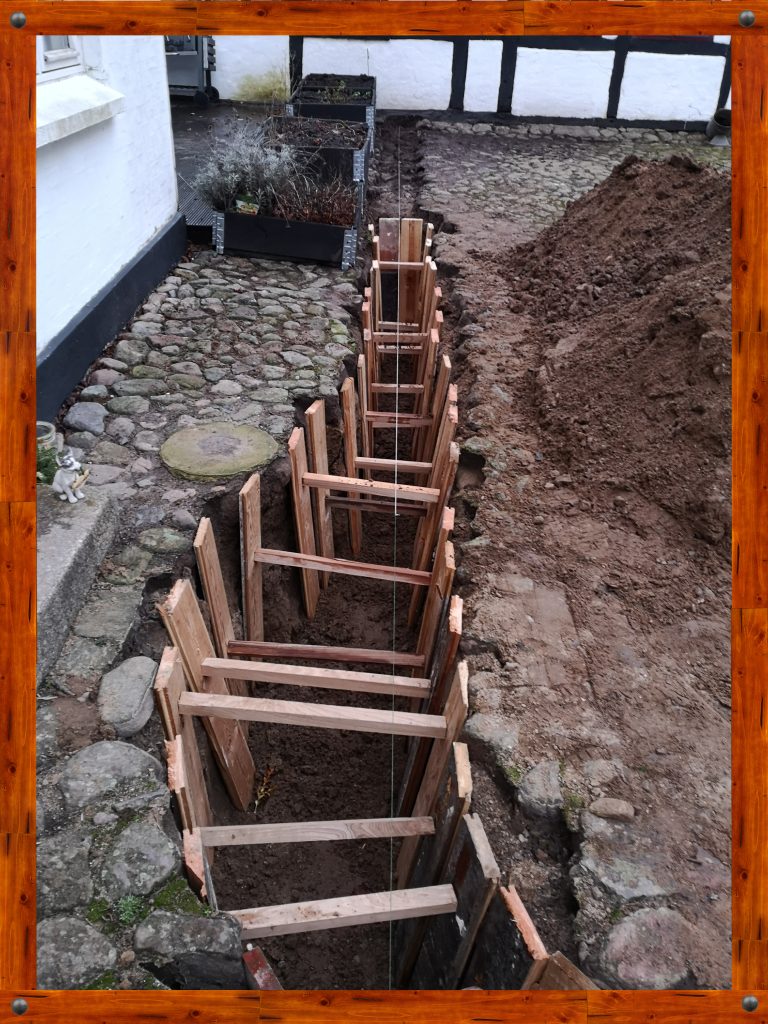
In the early spring of 2020, we started building the sewer and water pipe system outside with the help of our fathers. With their valuable experience, we were able to talk about the different ways to run the pipes and sketch them on paper. Measuring and calculating the depth and fall of the sewer pipes was an important part of that.
Then we got down to the physical work in the yard, first removing the large and heavy stones from the ground and then digging the trenches for the pipes with shovel and spade, not without a lot of sweat on our foreheads and sore muscles for days , but it was a good workout nonetheless. Surprisingly, some old pipelines turned up that hadn’t been built according to plan.
We stabilized the side walls of the trench with wooden beams to prevent them from collapsing. Next, we laid the pipes in sand, backfilled the trench and compacted the soil. Finally, we put the stones back into the ground as best we could in the same pattern.
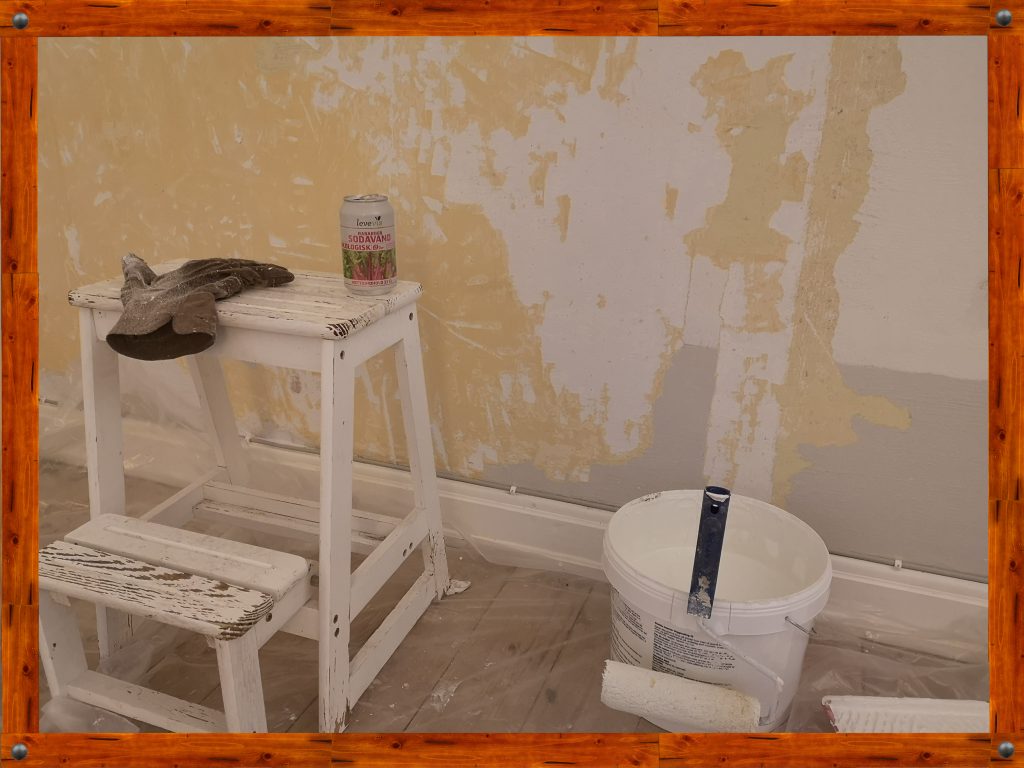
Then we started painting the walls and ceiling of the two guest rooms – step by step. We started by removing all loose plaster and paint, then repaired any holes and unevenness with filler, after which it was sanded smooth and even. Before we started painting the walls, we covered the edges with painter’s tape. In addition, we protected the floor with a felt cloth that could be moved around as the painting progressed. We didn’t have any special painting techniques, but we were delighted when we saw the great result with no roller or brush marks.
Meanwhile, the Covid19 virus spread around the world and the first lockdown hit us. Uncertain times came, priorities shifted and our construction project was temporarily halted. But the shutdown gave us enough time to discuss whether and how to continue with our building project.
2020, summer
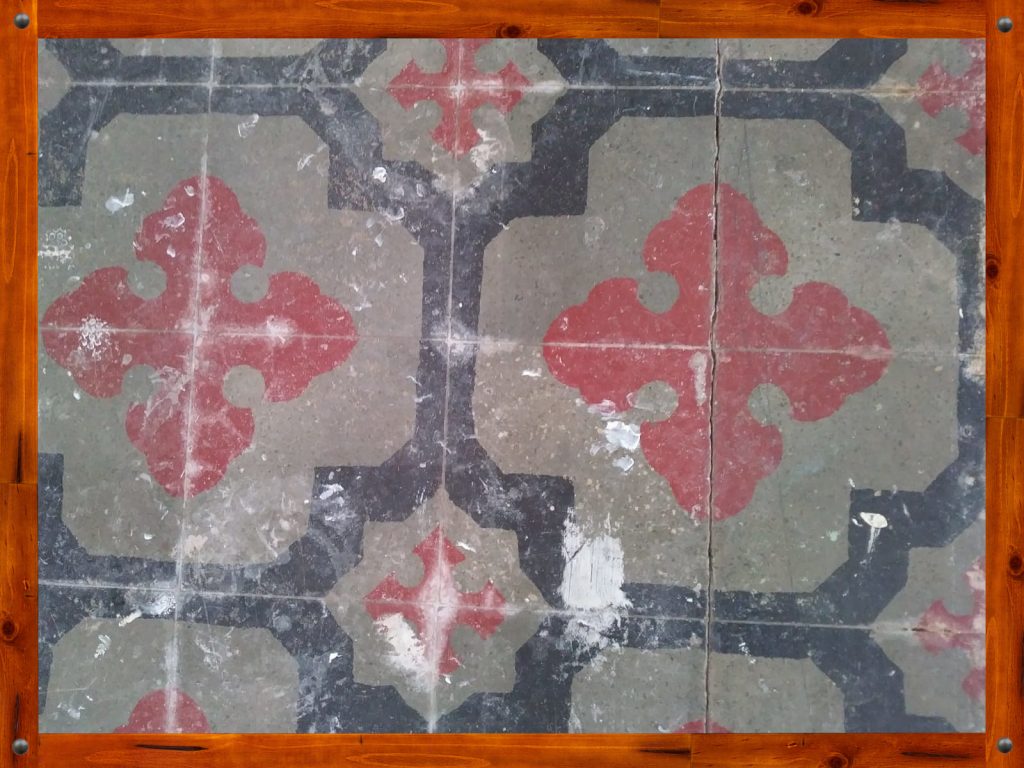
Driven by curiosity, we lifted up the floor of the future communal kitchen (then the old school’s wooden corridor) to see what the floor structure looked like and what had been installed underneath. This was important to know in order to plan the sewer system of the house. And who knows, maybe there was a treasure to be found…
So it actually happened that we came across beautiful old but well preserved tiles underthe floor. To preserve the charm of the old school more clearly, we are considering making the old tiles completely visible again.
During later excavations of the soil in the guest bathroom, we also found an old teaspoon. We used the excess soil from the excavation as fill material for the stone wall next to the shop.
2020/2021, winter
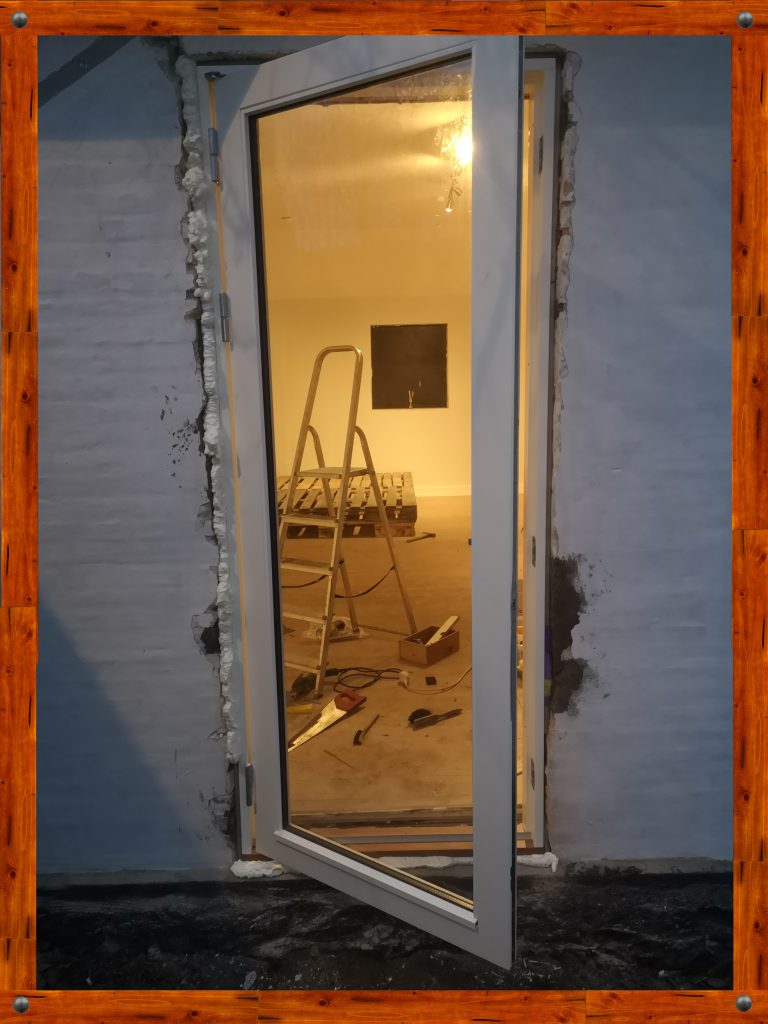
In the winter of 2020/2021, we continued construction work in one guest room and converteda window to a door with access to the garden. Since the window was due to be replaced anyway because it was single-pane, it was a good opportunity to spruce up the room. So we removed the old window, tore the wall down to the floor and fitted the new door. In this way we could increase the amount of natural light in the room and create a nice view of the garden. We stored some of the oldbricks with a view to reusing them for other purposes during the building project.
We plan to build a terrace in front of the new garden door to compensate for the difference in height between the door threshold and the ground, giving easyaccess to the garden.
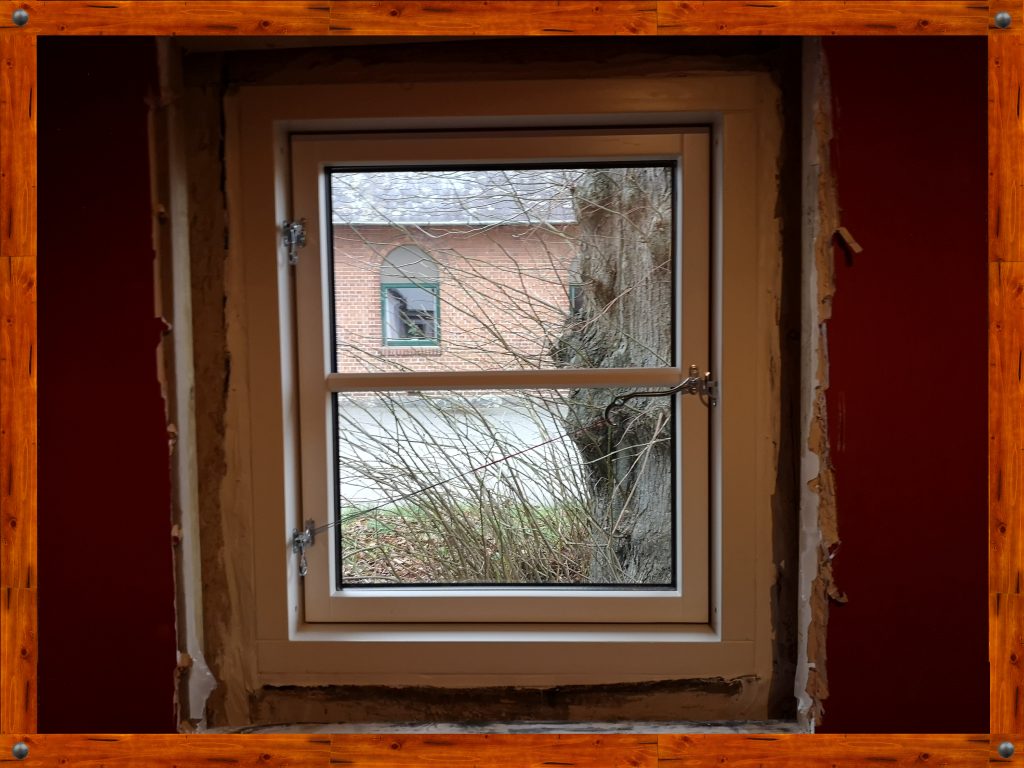
In addition, we reopened an old window hole, hidden behind a shutter, in the guest bathroom. After removing the window shutter and the underlying insulation material, we removed the last remnants of material from the walls. The subsequent installation of the new window went quicker than we thought. First, we fixed it with mountingwedges so that it was properly aligned. Then we fastenedthe window frame into the wall with appropriate screws. After we had removed the wedges, we insulated the correspondinggapswithfoam backer rod. The remaining joints between wall and frame were sealed with silicone. Now we just need to paint around the window to make it look nice.
By the way, the old shutter was converted into a table top for outdoor use.
2021, spring and summer
In spring 2021, we removed the bricks from a partition wall to create even more light in the guest bathroom. The old bricks were kept to be reused elsewhere in the construction process.
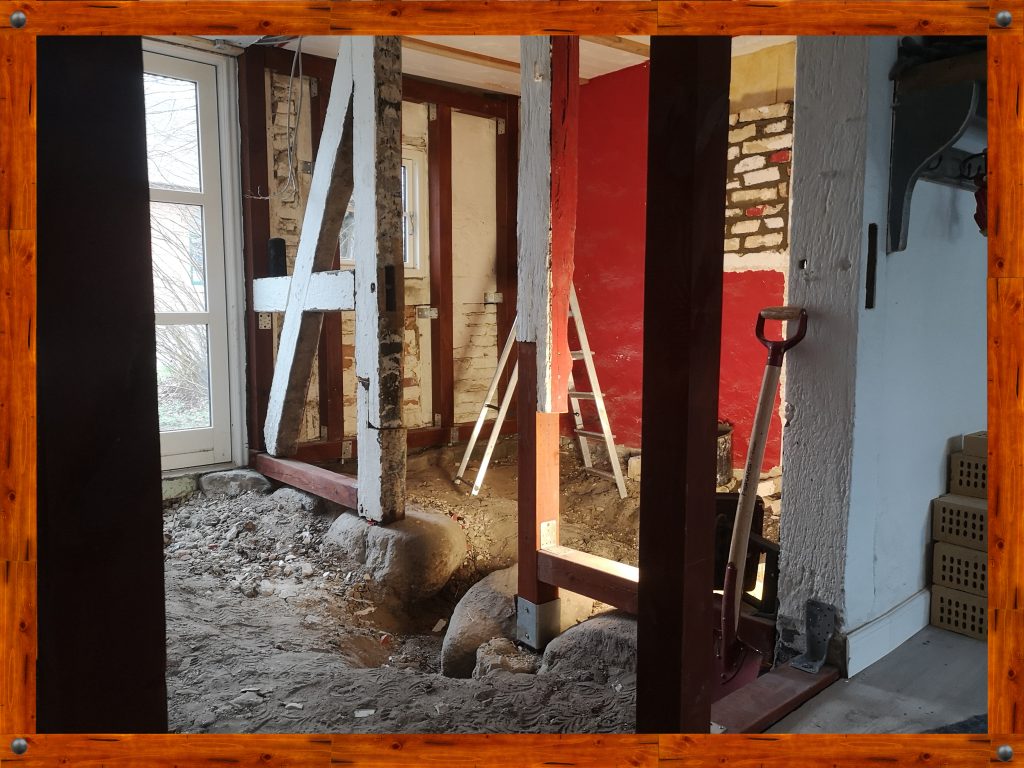
It was also necessary to replace parts of the old worm-eatenand decayed posts and beams with new sectionsin the timber frame close to the ground. The difference can be clearly seen and should be preserved as a sign of the passage oftime. The loose paint on the old beams was sanded off, the rest is preserved and thus tells the history of the house.
To separate the kitchen and bathroom, we installed new posts and beams for a new partition wall. So thatwe could move the entrance to the bathroom to the new wall, we reusedan old but well preserved door from the old school, which we found in the attic of the other side building.
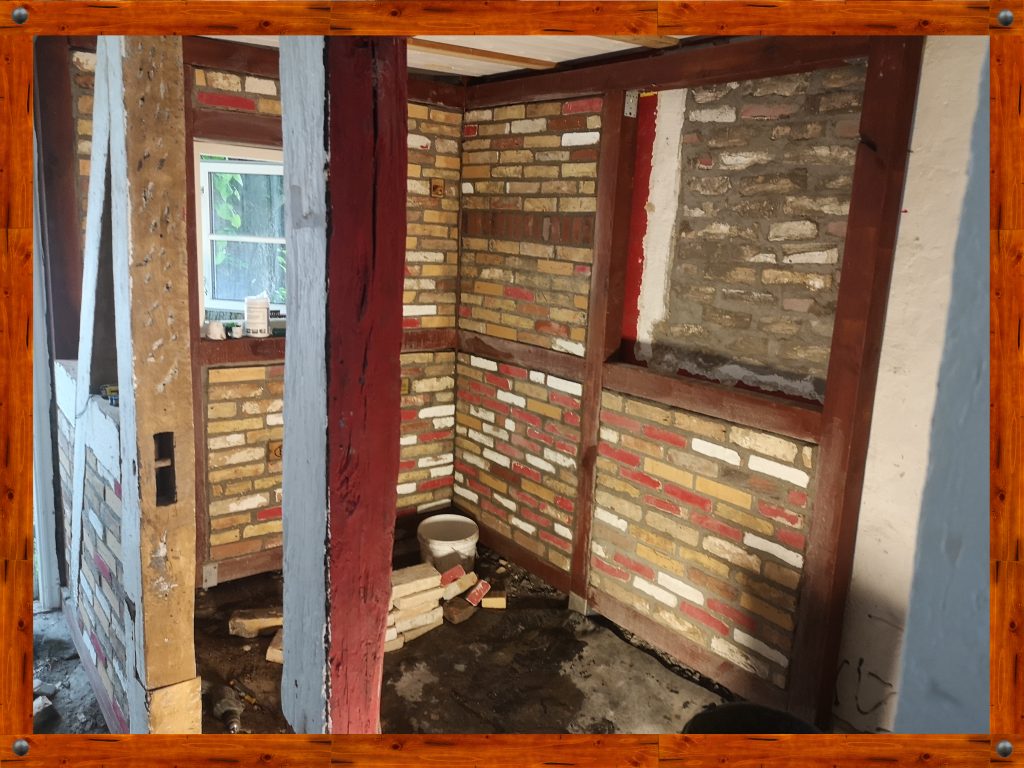
Some of the walls were unstable and either had to be repointed, or the old mortar between the bricks had to be painstakingly broken out a few centimetres at a time with hammer and chisel and replaced, which didn’t happen without us gettingblisters on our hands, even though we were wearing work gloves.
For the repointing, we partly reused the old bricks from the schooland partly reused historic bricks from both the old dairy and the demolished chimney from the old horticultural farm in Krarup. On the one hand, we just thought it was nice to connect the flair of the old school with the industry of the time and our recycling policy in this way as a reminder. On the other hand, this decision was associated with hard work, because all the bricks had to be carefully released one by one from the old mortar with a hammer and chisel, which of course was not possible without getting bruisedfingers if the hammer did not hit the right spot.
In this way, beautiful and unique walls were created in the guest bathroom in the summer of 2021.
2021, late summer and autumn
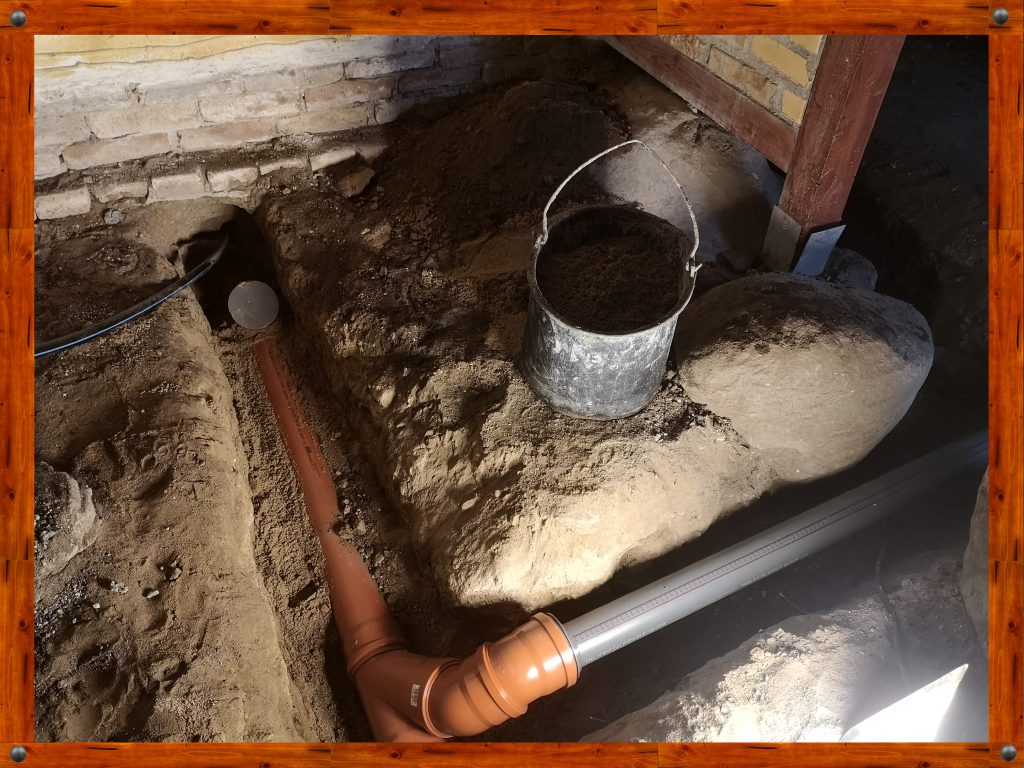
In late summer we built the sewer system inside. It sounds easy, but it wasn’t. In fact, it was a challenge because the walls were built on big heavy stones and it was difficult to get the sewer system through. After much deliberation, we positioned the pipework in such a way that we only had to dig out one of the heavy stones completely and move it with our combined strength. We laid the pipes in sand to a suitable depth and fall, filled in the trench and compacted the soil.
Then we filled the floor with layers of self-mixed concrete and insulation. The concrete mix had to contain a certain ratio of sand, cement and water, which also resulted in a good working rhythm in the implementation. So for example sand, sand, sand, cement, water – – mix and again sand, sand, sand, cement, water – – mix and so on. Haha, I still dream about it at night 🙂
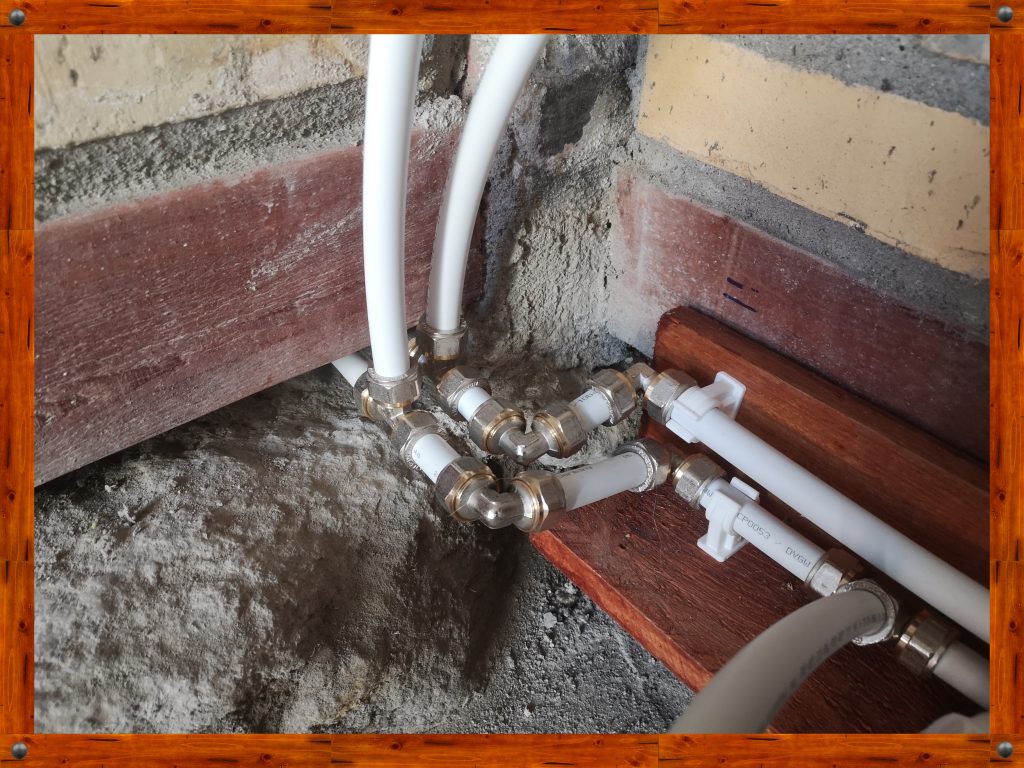
The subsequent laying of the water pipes was exciting because we had never done it before. So we spent many hours searching for information, reading about it and discussing it until we were completely sure we could lay the water pipes ourselves.
For easy installation and long durability, we chose alupex pipes that are connected with fittings. The water pipes are in the floor in a covered channel, so they are both easily accessible in case of a material or installation error and protected from damage. It also means that the escaping water cannot easily undermine the foundation in the event of a burstpipe.
Finally, when all the pipes were finally in place, we let the water run through with crossed fingers to check that they were tight. It was a good sign, as the pipes passed the functional test and a big cheer went through the house.
2021/2022, vinter

With the help of the skilled electricians, the power cables could be laid, the light switches and sockets mounted and the lighting installed in the ceiling.
When the electricians installed the sockets in the wall, they first cut some grooves with a groove cutter in the wall through which the cables were pulled. A hole was cut for the wall sockets in the places where they would be. After the electricians had finished their work, we plastered or spackled the walls.
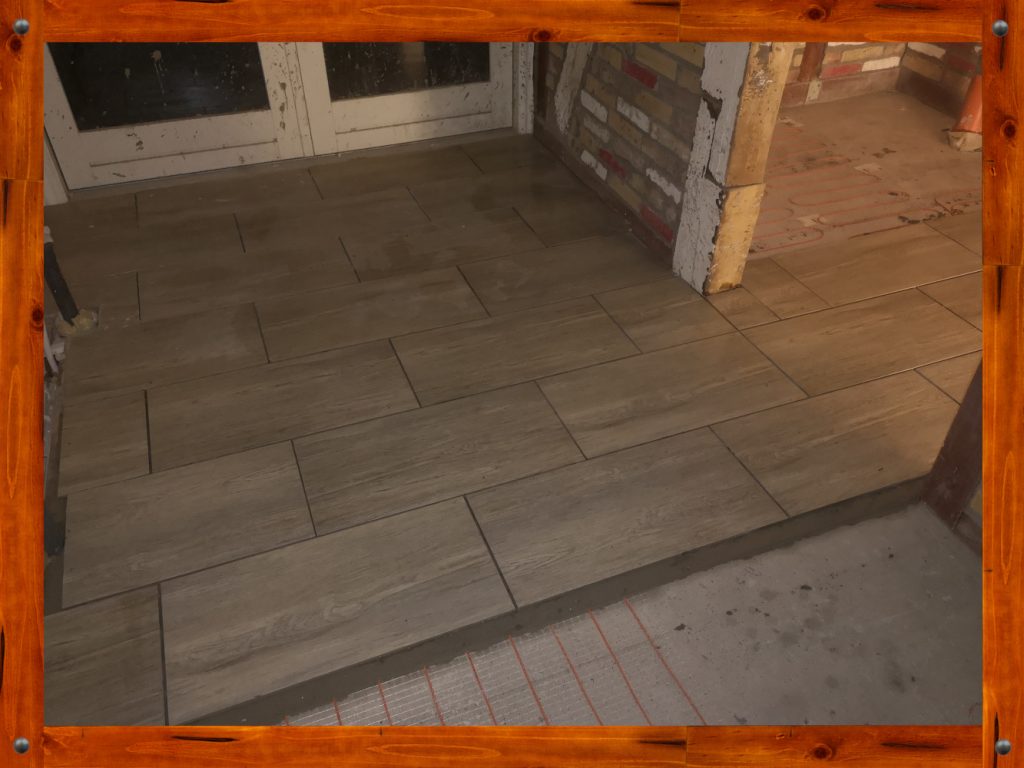
The electricians also installed the underfloor heating system. Then we could start filling the uneven areas with self-leveling floor screed. Then the floor was ready for the tiles to be laid.
But before that, we laid out a series of tiles to find out how best to fit with the least waste. We smeared tile adhesive on the back of the tiles and started opposite the door so we could easily work our way towards the door and not block our path. Two days later, we grouted the tiles diagonally across the joints and washed off the excess grout with water and a sponge.
Naturally, we tested the functionality of the underfloor heating barefoot as soon as we could walk on the tiles, and when we felt the comfortable warmth under our bare feet, the cheers broke out once again.
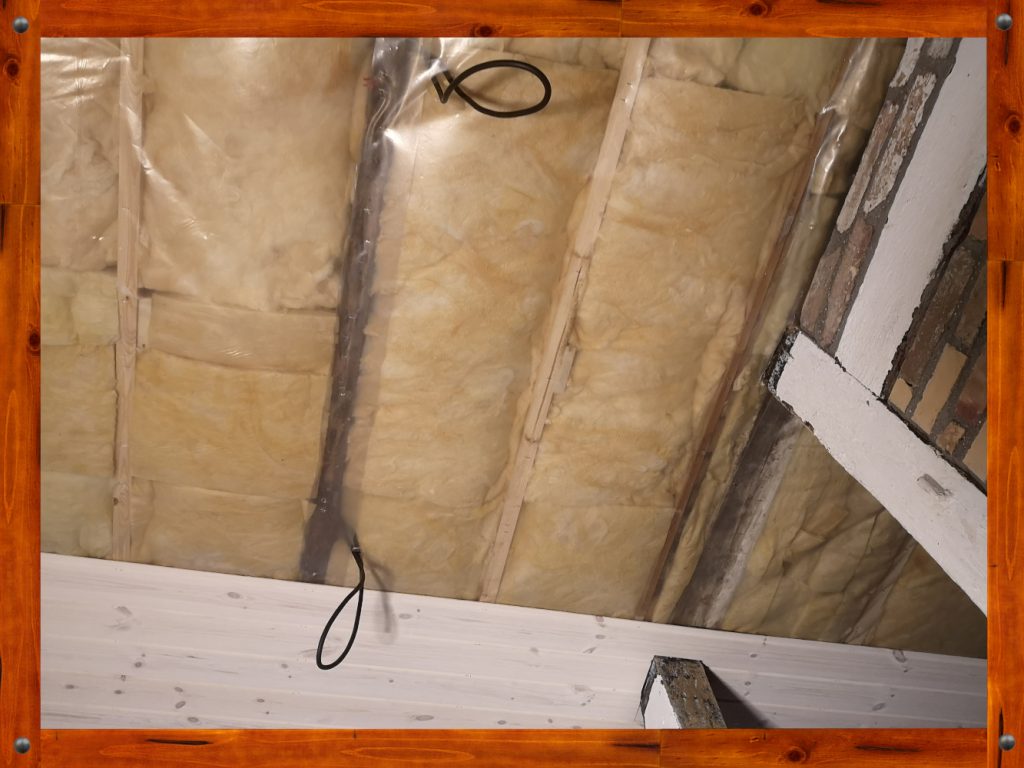
As we had to open the ceiling due to some electrical cables that were untidy or hidden in the ceiling, we seized the chance to alsoremove the existing insulation that had been soaked by rainwater.
On the newly prepared ceiling, we placed the ceiling battens in dimensions that are the same height as the planned new insulation thickness and cut the insulation mouldings to a small oversize so that they could fit between the ceiling battens. We then applied the vapour barrier to the warm side and stapled it in place with a pneumatic staple gun. We put up cable ducts where the power outlets in the ceiling would be. Finally we fitted the ceiling cladding and the electricians installed the LED lighting.

In the spring of 2022 we painted the bathroom and the shared kitchen, furnished the rooms with furniture that, in keeping with our eco-friendly spirit, is mostly homemade from reclaimed wood (e.g. the sink, bed frames and shelves) or bought from charity shops. Last but not least, we cleaned the rooms thoroughly and prepared them for the opening. Now the final work is done, we are open forbookings and ready to welcome guests, whomwe hope will begin booking right way.
We would like to take this opportunity to thank all those who came to the opening of our Bed & Breakfast on 05.06.2022. We spent pleasant hours with lots of chatting, coffee and cake in the special atmosphere of Old Krarup School. We would like to say thank you for all the nice gifts we received. We had a fantastic and sunny day!
Special future plans: This summer we plan to add a terrace to the garden by the guest room and this fall autumn we will do something with soundproofing in the room “skolestue” (schoolroom). In a few years we will replace the roof of the main house with tiles with integrated solar cells, so we can supply ourselves with electricity and run the house in an even more climate-friendly way, including a charging station for electric cars. In addition, we want to extend the side building on the first floor to create more rooms for Bed and Breakfast, if the project is successful or as the business expands.
A special thanks you for the support ofwiththe building materials to our neighbours Stine and Jens, the old nursery and Helene at the old dairy. We thank the company Espe & Gestelev El-forretning ApS for the installation of lighting, sockets and underfloor heating. A warm thank you goes to our fathers for their good tips and helping hands. Last but not least, a big thank you goes to Chris for his help in getting the building materials, the many constructive conversations and cleverdetaileddrawings.